Adding New User Accounts to MySQL

Adding New User Accounts to MySQL

You can create MySQL accounts in two ways:

  • By using statements intended for creating accounts, such as CREATE USER or GRANT

  • By manipulating the MySQL grant tables directly with statements such as INSERT, UPDATE, or DELETE

The preferred method is to use account-creation statements because they are more concise and less error-prone. CREATE USER and GRANT are described in CREATE USER Syntax, and GRANT Syntax.

Another option for creating accounts is to use one of several available third-party programs that offer capabilities for MySQL account administration. phpMyAdmin is one such program.

The following examples show how to use the mysql client program to set up new users. These examples assume that privileges are set up according to the defaults described in Section 2.3, “Securing the Initial MySQL Accounts”. This means that to make changes, you must connect to the MySQL server as the MySQL root user, and the root account must have the INSERT privilege for the mysql database and the RELOAD administrative privilege.

As noted in the examples where appropriate, some of the statements will fail if you have the server's SQL mode has been set to enable certain restrictions. In particular, strict mode (STRICT_TRANS_TABLES, STRICT_ALL_TABLES) and NO_AUTO_CREATE_USER will prevent the server from accepting some of the statements. Workarounds are indicated for these cases. For more information about SQL modes and their effect on grant table manipulation, see Server SQL Modes, and GRANT Syntax.

First, use the mysql program to connect to the server as the MySQL root user:

shell> mysql --user=root mysql

If you have assigned a password to the root account, you'll also need to supply a --password or -p option for this mysql command and also for those later in this section.

After connecting to the server as root, you can add new accounts. The following statements use GRANT to set up four new accounts:

mysql> GRANT ALL PRIVILEGES ON *.* TO 'monty'@'localhost'
-> IDENTIFIED BY 'some_pass' WITH GRANT OPTION;
mysql> GRANT ALL PRIVILEGES ON *.* TO 'monty'@'%'
-> IDENTIFIED BY 'some_pass' WITH GRANT OPTION;
mysql> GRANT RELOAD,PROCESS ON *.* TO 'admin'@'localhost';
mysql> GRANT USAGE ON *.* TO 'dummy'@'localhost';

The accounts created by these GRANT statements have the following properties:

  • Two of the accounts have a username of monty and a password of some_pass. Both accounts are superuser accounts with full privileges to do anything. One account ('monty'@'localhost') can be used only when connecting from the local host. The other ('monty'@'%') can be used to connect from any other host. Note that it is necessary to have both accounts for monty to be able to connect from anywhere as monty. Without the localhost account, the anonymous-user account for localhost that is created by mysql_install_db would take precedence when monty connects from the local host. As a result, monty would be treated as an anonymous user. The reason for this is that the anonymous-user account has a more specific Host column value than the 'monty'@'%' account and thus comes earlier in the user table sort order. (user table sorting is discussed in Section 3.4, “Access Control, Stage 1: Connection Verification”.)

  • One account has a username of admin and no password. This account can be used only by connecting from the local host. It is granted the RELOAD and PROCESS administrative privileges. These privileges allow the admin user to execute the mysqladmin reload, mysqladmin refresh, and mysqladmin flush-xxx commands, as well as mysqladmin processlist . No privileges are granted for accessing any databases. You could add such privileges later by issuing additional GRANT statements.

  • One account has a username of dummy and no password. This account can be used only by connecting from the local host. No privileges are granted. The USAGE privilege in the GRANT statement enables you to create an account without giving it any privileges. It has the effect of setting all the global privileges to 'N'. It is assumed that you will grant specific privileges to the account later.

  • The statements that create accounts with no password will fail if the NO_AUTO_CREATE_USER SQL mode is enabled. To deal with this, use an IDENTIFIED BY clause that specifies a non-empty password.

As an alternative to GRANT, you can create the same accounts directly by issuing INSERT statements and then telling the server to reload the grant tables using FLUSH PRIVILEGES:

shell> mysql --user=root mysql
mysql> INSERT INTO user
-> VALUES('localhost','monty',PASSWORD('some_pass'),
-> 'Y','Y','Y','Y','Y','Y','Y','Y','Y','Y','Y','Y','Y','Y');
mysql> INSERT INTO user
-> VALUES('%','monty',PASSWORD('some_pass'),
-> 'Y','Y','Y','Y','Y','Y','Y','Y','Y','Y','Y','Y','Y','Y',
-> '','','','',0,0,0,0);
mysql> INSERT INTO user SET Host='localhost',User='admin',
-> Reload_priv='Y', Process_priv='Y';
mysql> INSERT INTO user (Host,User,Password)
-> VALUES('localhost','dummy','');
mysql> FLUSH PRIVILEGES;

The reason for using FLUSH PRIVILEGES when you create accounts with INSERT is to tell the server to re-read the grant tables. Otherwise, the changes go unnoticed until you restart the server. With GRANT, FLUSH PRIVILEGES is unnecessary.

The reason for using the PASSWORD() function with INSERT is to encrypt the password. The GRANT statement encrypts the password for you, so PASSWORD() is unnecessary.

The 'Y' values enable privileges for the accounts. Depending on your MySQL version, you may have to use a different number of 'Y' values in the first two INSERT statements. For the admin account, you may also employ the more readable extended INSERT syntax using SET.

In the INSERT statement for the dummy account, only the Host, User, and Password columns in the user table row are assigned values. None of the privilege columns are set explicitly, so MySQL assigns them all the default value of 'N'. This is equivalent to what GRANT USAGE does.

If strict SQL mode is enabled, all columns that have no default value must have a value specified. In this case, INSERT statements must explicitly specify values for the ssl_cipher, x509_issuer, and x509_subject columns.

Note that to set up a superuser account, it is necessary only to create a user table entry with the privilege columns set to 'Y'. user table privileges are global, so no entries in any of the other grant tables are needed.

The next examples create three accounts and give them access to specific databases. Each of them has a username of custom and password of obscure.

To create the accounts with GRANT, use the following statements:

shell> mysql --user=root mysql
mysql> GRANT SELECT,INSERT,UPDATE,DELETE,CREATE,DROP
-> ON bankaccount.*
-> TO 'custom'@'localhost'
-> IDENTIFIED BY 'obscure';
mysql> GRANT SELECT,INSERT,UPDATE,DELETE,CREATE,DROP
-> ON expenses.*
-> TO 'custom'@'whitehouse.gov'
-> IDENTIFIED BY 'obscure';
mysql> GRANT SELECT,INSERT,UPDATE,DELETE,CREATE,DROP
-> ON customer.*
-> TO 'custom'@'server.domain'
-> IDENTIFIED BY 'obscure';

The three accounts can be used as follows:

  • The first account can access the bankaccount database, but only from the local host.

  • The second account can access the expenses database, but only from the host whitehouse.gov.

  • The third account can access the customer database, but only from the host server.domain.

To set up the custom accounts without GRANT, use INSERT statements as follows to modify the grant tables directly:

shell> mysql --user=root mysql
mysql> INSERT INTO user (Host,User,Password)
-> VALUES('localhost','custom',PASSWORD('obscure'));
mysql> INSERT INTO user (Host,User,Password)
-> VALUES('whitehouse.gov','custom',PASSWORD('obscure'));
mysql> INSERT INTO user (Host,User,Password)
-> VALUES('server.domain','custom',PASSWORD('obscure'));
mysql> INSERT INTO db
-> (Host,Db,User,Select_priv,Insert_priv,
-> Update_priv,Delete_priv,Create_priv,Drop_priv)
-> VALUES('localhost','bankaccount','custom',
-> 'Y','Y','Y','Y','Y','Y');
mysql> INSERT INTO db
-> (Host,Db,User,Select_priv,Insert_priv,
-> Update_priv,Delete_priv,Create_priv,Drop_priv)
-> VALUES('whitehouse.gov','expenses','custom',
-> 'Y','Y','Y','Y','Y','Y');
mysql> INSERT INTO db
-> (Host,Db,User,Select_priv,Insert_priv,
-> Update_priv,Delete_priv,Create_priv,Drop_priv)
-> VALUES('server.domain','customer','custom',
-> 'Y','Y','Y','Y','Y','Y');
mysql> FLUSH PRIVILEGES;

The first three INSERT statements add user table entries that allow the user custom to connect from the various hosts with the given password, but grant no global privileges (all privileges are set to the default value of 'N'). The next three INSERT statements add db table entries that grant privileges to custom for the bankaccount, expenses, and customer databases, but only when accessed from the proper hosts. As usual when you modify the grant tables directly, you must tell the server to reload them with FLUSH PRIVILEGES so that the privilege changes take effect.

If you want to give a specific user access from all machines in a given domain (for example, mydomain.com), you can issue a GRANT statement that uses the “%” wildcard character in the host part of the account name:

mysql> GRANT ...
-> ON *.*
-> TO 'myname'@'%.mydomain.com'
-> IDENTIFIED BY 'mypass';

To do the same thing by modifying the grant tables directly, do this:

mysql> INSERT INTO user (Host,User,Password,...)
-> VALUES('%.mydomain.com','myname',PASSWORD('mypass'),...);
mysql> FLUSH PRIVILEGES;

Mengembalikan Data yang Hilang

Mengembalikan Data yang Hilang
Aduh....sebelumnya...ni gara2 aku kesel ma Kantorku bekerja....di bagian Reparasi dan Recovery Hardisk....coz...dah 2 bulan gajiku ga dibayar....
padahal....aku kerja kan sebagai karyawan teladan (telat datang pulang duluan) abis ngapain lagi..teknisi kan kerjanya cuma dirumah n malem hari....klo siang...?? tidur....!!!
Cara ini sih ketemu gara2 dulu ngilangin data server di sekolahku dulu....pokoknya 1 hardisk 4 partisi (C, D, E, F) hilang jadi *unknown* partition....or klo di Grub or Lilo *Partition Error* atawa *kernel panic* atawa *undefine partition* or apalah...pokoke tuh hardisk ilang data n partisinya....trus.....

aku bersusah payah....2 hari 2 malam gak bisa tidur...coz di Hardisk itu Core data Satu Yayasan....mulai dari administrasi, data pegawai, asset, hutang piutang pokoknya bank data itu yayasan lah....akhirnya aku dapet wangsit untuk coba2 pake software wat recovery, mulai dari Easy Recovery, Hiren's CD *kumpulan tools Hardisk*, atau apalah sejenisnya...tapi msh belum berhasil juga, data yang kembali tidak 100% paling cuma 40%...karena takut di marahi ma yg punya Yaysan
akhirnya.....aku minta wangsit lagi.., pokoke yg lebih mujarabb....yap....wangsit ke 2 itu aku coba.....al hamdulillah berhasil and aku bisa kerja jadi master Repair & Recovery Hardisk. Mau tau caranya?????
tapi jangan kasih tau siapa-siapa ya....!! coz ini dapurnya orang Reparasi Hardisk.... tapi tanggung lagi kesel ma tuh __**edited**__ Komputer di Depok, tapi tenanglah...kayanya orang reparasi Hardisk gak bakal punya wangsit secanggih ini, ini dateng dari Mbah Dani Maulana n Ki Andri Johandri isi wangsitnya gini : ....
1. Harus menggunakan Linux Live CD Knoppix 5.0 atau dibawahnya...coz gak tau kalo di 6 - 8 masih ada gak tuh tools'y...
2. Oke...setelah boot lewat CD ketik
Loading : Linux 2 {ini tandanya kita cuma masuk di console doank}
3. Yups...setelah masuk n selesai loading .... masuk di root...

toolsnya cuma 1 kata...yang bisa ngebalikin data HDD Full 1000% kembali, tapi sebelum 3x format n sebelum di format 2x reiser Fs
perintahnya...

$ testdisk

ya...cuma segitu doang...pokoke pelajari aja toolsnya...ya...
coz kalo nanti pada tau semua....aku gak bisa kebanjiran Objek....
jadi jangan putus asa dulu kalo yang kehilangan data.....karena virus, kehapus atawa ke format...masih ada tools sakti wat HDD..
key...selamat mencoba......
klo butuh bantuan bisa email di helpaku@gmail.com website http://tutorialkomputer.net

Membangun Sendiri Radio Internet

Membangun Sendiri Radio Internet
by Romi Satria Wahono

jadwalsiaran.JPGMengiringi pengumuman tentang Radio IlmuKomputer.Com di milis-milis, banyak yang menanyakan ke saya tentang teknik membangun radio internet atau radio online. Sebenarnya caranya sangat mudah dan tidak memakan banyak waktu atau uang ;). Persyaratannya juga hanya komputer dan koneksi internet untuk infrastruktur, serta Winamp, Shoutcast, dan Shoutcast DSP Plugin untuk softwarenya. Ketiga software tersebut bisa kita dapatkan secara gratis di Internet (freeware) untuk versi Linux maupun Windows. Dengan itu kita bisa jadi broadcaster yang menyiarkan content radio sesuai dengan yang kita inginkan ke seluruh dunia maya. Tertarik? Mari kita bahas bahas secara bertahap bagaimana membuat radio internet ini.

1. Download software yang diperlukan:

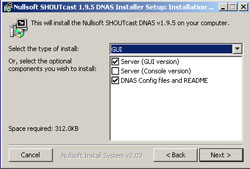
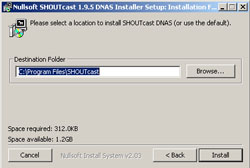
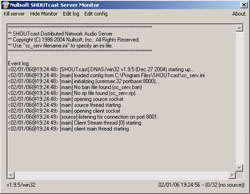
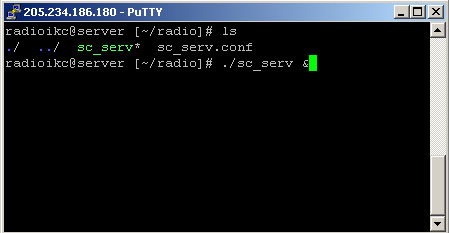
2. Install dan jalankan Shoutcast Server di komputer yang ingin kita jadikan server. Untuk instalasi di Linux cukup ekstrak file “shoutcast-1-9-5-linux-glibc6.tar.tar” dan jalankan file “sc_serv”. Tidak perlu menjadi root untuk menjalankannya.

3. Install Winamp dan Shoutcast DSP Plugin di komputer tempat kita akan mengalirkan content radio (mp3 music, dsb) ke Shoutcast Server.

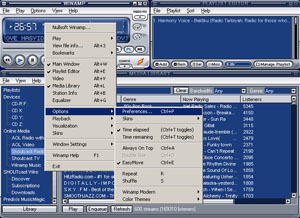
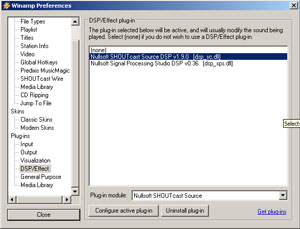
4. Jalankan Winamp, kemudian klik kanan dan pilih “Options” -> “Preferences”.

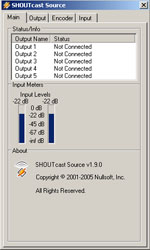
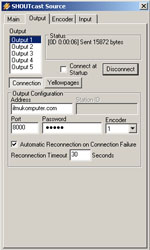
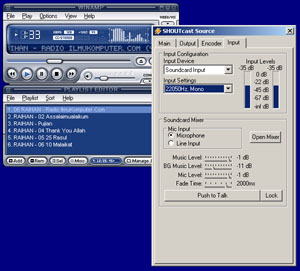
5. Klik DSP/Effect di bagian Plug-ins dan pilih Nullsoft SHOUTcast Source DSP. Kemudian akan muncul satu window SHOUTcast Source dengan menu “Main”, “Output”, “Encoder”, “Input”.

winamp-shoutcastdsp.jpg

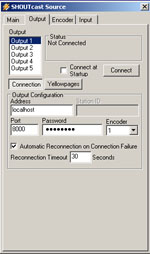
6. Pilih “Output” dan klik “Connect” untuk konek ke Shoutcast server, sebelumnya perlu diperhatikan beberapa hal di bawah:

  • Cek “Address” apakah sudah sesuai dengan server anda. Pilih “localhost” apabila anda install server di tempat anda menginstall Winamp dan DSP Plugin.
  • Password default adalah “Changeme” (tanpa tanda kutip). Anda dapat mengubah setting password ini di “sc_serv.ini” atau “sc_serv.conf” yang terletak satu direktori dengan Shoutcast Server. (C:\Program Files\SHOUTcast\ untuk versi Windows)

winamp-shoutcastdsp2.jpg winamp-shoutcastdsp3.jpg

7. Sekarang tinggal alirkan saja content (music, sound, dsb) ke Shoutcast Server. Caranya mudah, letakkan file mp3 di Winamp dan tekan tanda play, maka music anda akan ter-broadcast ke seluruh dunia maya.

winamp-shoutcastdsp5.jpg

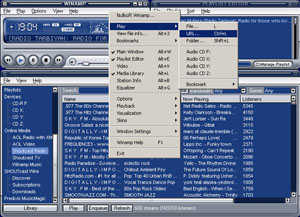
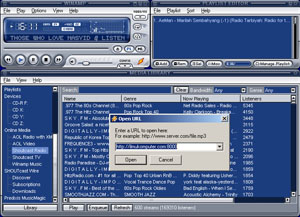
8. Cek dengan menjalankan Winamp dari komputer lain dan klik kanan pilih “Play” -> “URL” dan masukkan http://serveranda:8000. Ganti “serveranda” dengan nama domain atau IP address dimana Shoutcast server diinstal dan dijalankan.

winampradio-playurl.jpg winampradio-openurl.jpg

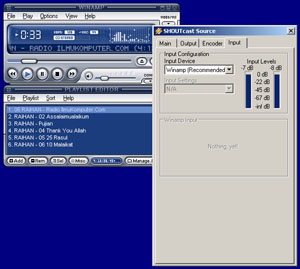
9. Pertanyaan lain yang muncul, bagaimana kalau kita ingin mengalirkan suara kita secara live? Siapkan microphone dan masukkan kabel microphone ke soundcard PC anda. Kemudian kembali ke Winamp anda, pada SHOUTcast source, pilih “Input”, kemudian ubah “Input device” dari “Winamp (recommended)” ke “Soundcard Input”. Lalu siapkan microphone di depan mulut anda, dan ucapkan “Selamat datang di Radio Internet saya yang tercinta ini”.

winamp-shoutcastdsp6.jpg

Anda sudah memiliki Radio Internet sendiri sekarang. ;) Sebagai informasi tambahan, untuk membangun Radio Internet kita juga bisa menggunakan software lain selain Shoutcast, diantaranya adalah: Unreal Media Server, SAM2 Broadcaster, Pirate Radio, Peercast, Icecast, Andromeda, dsb. Konsepnya tidak jauh berbeda dengan Shoutcast, jadi bekal anda dengan 9 tahapan diatas sudah cukup untuk membuat anda mahir membangun sendiri Radio Internet.

Yang tetap masih penasaran dan pingin melihat secara live ulasan tentang Radio Internet ini, Insya Allah bisa mengikuti acara elifestyle Metro TV hari Sabtu, 4 Pebruari 2006 pukul 14:30. Mudah-mudahan tidak ada aral melintang.

radioikc.JPG metroradioikc.JPG

Tetap dalam perdjoeangan …

ttd-small.jpg

Membuat web Server di belakang Router

Membuat web Server di belakang Router
Setelah terinspiraasi dari web control panelnya router mikrotik, mislanya dengan cara mengakses http://[ip_public]:8081 maka gue ingin punya webmail server / web intranet perusahaan yang dapat diakses dari luar

Setelah baca sana sini, mengenai routing untuk meredirect web server internal ke dunia luar, dan katanya teknisi ISP yg katanya ga bisa karena..... (mungkin ilmunya belum sampai ke sini kali ya)... akhirnya gue menemukan sesuatu

Keterangan:
ip address yg dapat diakses dari luar,misal 200.123.200.123 ingin dibuat menjadi web server, maka dapat diketikkan di browser:
http://200.123.200.123 maka kita mempunyai web server sendiri yg dapat diakses dari luar. untuk pendaftaran domain harus ke idNIC ato dll sbgnya maka aku sudah puas dengan mengakses lewat ip publicnya saja.
tapi kalo sudah mempunyai webhosting, dan ingin dibuat subdomain, misalnya webmail.forummikrotik.com bisa aja, tinggal di set aja lewat ccPanelnya.

Code:
/ ip firewall nat
add chain=dstnat dst-address=<> protocol=tcp dst-port=80 action=dst-nat to-addresses=<> \
to-ports=80 comment="" disabled=no

/ ip firewall nat
add chain=srcnat dst-address=<> protocol=tcp dst-port=80 action=src-nat to-addresses=<> \
to-ports=0-65535 comment="" disabled=no
di rule kedua dan action dst-nat di rule pertama, web server intranet default adalah 80, jika tidak ingin memakai default port 80, misalnya 3000 untuk port ip public internetnya bisa di modifikasi portnya seperti ini:
Code:
add chain=dstnat dst-address= protocol=tcp dst-port=3000 action=dst-nat to-addresses=<> \
to-ports=80 comment="" disabled=no
kalau ingin mengakses ke web internal dengan cara mengetikkan sbb: http://202.123.200.123:3000

jika web server internal perusahaan / intranet tidak memakai port 80 bisa dimodifikasi sbb, xx adalah port web internal /intranet perusahaan dan yy adalah port yang dapat diakses dari internet (lebih amannya web server internal memakai https, untuk akses dari dunia luar):

Code:
/ ip firewall nat
add chain=dstnat dst-address=<> protocol=tcp dst-port=yy action=dst-nat to-addresses= \
to-ports=xx comment="" disabled=no

/ ip firewall nat
add chain=srcnat dst-address=<> protocol=tcp dst-port=xx action=src-nat to-addresses=<> \
to-ports=0-65535 comment="" disabled=no
dengan adanya rule ini, kita bisa membuat banyak web server dalam 1 ip public

Good Luck
loh kok aneh sih.....
gue post ada alamat ip public sama ip lokalnya kok....

gue ralat yah postingan di atas.
mohon maap sebesar besarnya jika membuat bingung.

udah gue ralat, sekalian gue gambarin juga topologinya
ip public mikrotik ipA=Public_IP_address=200.123.200.123
ip range lokal = 192.168.0.0/24
ip internal mikrotik ipB=Router_Internal_IP_address=192.168.0.2
ip internal webserver ipC=Web_Server_IP_address_lokal= 192.168.0.3


inet-----------------mikrotik----------hub-------------client
.......................ipA............ipB......... ..|
.................................................. ....----------------webserver
.................................................. .....................ipC

Rule Firewall milik Dmitry di MUM 2006 tahun kemaren

Rule Firewall milik Dmitry di MUM 2006 tahun kemaren


Setelah cari cari di wiki dapet juga isi firewall-nya Dmitry (Dmitry Golubev, MikroTik (Latvia) Documentation writer and expert in networking, has worked at MikroTik for four years.)

Ini hasil kopas yang diterjemahkan secara bebas dan juga beberapa penyesuaian.
Kalau bro bro / sis sis (ada ngga yah sis disini ??????) baca sumbernya disini:
http://wiki.mikrotik.com/wiki/Dmitry_on_firewalling

Komponen utama untuk menentukan firewall adalah:
* protocol classifier
* invalid packet filter
* port-scan detector
* policy classifier
* application protocol filter
* TCP-specific filters
* application protocol specific filters

Protocol Classifier
disini digunakan untuk mengklasifikasikan bebarapa port baik TCP atau UDP:
Code:
/ ip firewall mangle
add chain=prerouting protocol=tcp connection-state=new action=jump jump-target=tcp-services
add chain=prerouting protocol=udp connection-state=new action=jump jump-target=udp-services
add chain=prerouting connection-state=new action=jump jump-target=other-services
Untuk bagian TCP bisa dikelompokkan sebagai berikut:
Code:
add chain=tcp-services protocol=tcp src-port=1024-65535 dst-port=20-21 action=mark-connection new-connection-mark=ftp passthrough=no
add chain=tcp-services protocol=tcp src-port=513-65535 dst-port=22 action=mark-connection new-connection-mark=ssh passthrough=no
add chain=tcp-services protocol=tcp src-port=1024-65535 dst-port=23 action=mark-connection new-connection-mark=telnet passthrough=no
add chain=tcp-services protocol=tcp src-port=1024-65535 dst-port=25 action=mark-connection new-connection-mark=smtp passthrough=no
add chain=tcp-services protocol=tcp src-port=53 dst-port=53 action=mark-connection new-connection-mark=dns passthrough=no
add chain=tcp-services protocol=tcp src-port=1024-65535 dst-port=53 action=mark-connection new-connection-mark=dns passthrough=no
add chain=tcp-services protocol=tcp src-port=1024-65535 dst-port=80 action=mark-connection new-connection-mark=http passthrough=no
add chain=tcp-services protocol=tcp src-port=1024-65535 dst-port=110 action=mark-connection new-connection-mark=pop3 passthrough=no
add chain=tcp-services protocol=tcp src-port=1024-65535 dst-port=113 action=mark-connection new-connection-mark=auth passthrough=no
add chain=tcp-services protocol=tcp src-port=1024-65535 dst-port=119 action=mark-connection new-connection-mark=nntp passthrough=no
add chain=tcp-services protocol=tcp src-port=1024-65535 dst-port=143 action=mark-connection new-connection-mark=imap passthrough=no
add chain=tcp-services protocol=tcp src-port=1024-65535 dst-port=161-162 action=mark-connection new-connection-mark=snmp passthrough=no
add chain=tcp-services protocol=tcp src-port=1024-65535 dst-port=443 action=mark-connection new-connection-mark=https passthrough=no
add chain=tcp-services protocol=tcp src-port=1024-65535 dst-port=465 action=mark-connection new-connection-mark=smtps passthrough=no
add chain=tcp-services protocol=tcp src-port=1024-65535 dst-port=993 action=mark-connection new-connection-mark=imaps passthrough=no
add chain=tcp-services protocol=tcp src-port=1024-65535 dst-port=995 action=mark-connection new-connection-mark=pop3s passthrough=no
add chain=tcp-services protocol=tcp src-port=1024-65535 dst-port=1723 action=mark-connection new-connection-mark=pptp passthrough=no
add chain=tcp-services protocol=tcp src-port=1024-65535 dst-port=2379 action=mark-connection new-connection-mark=kgs passthrough=no
add chain=tcp-services protocol=tcp src-port=1024-65535 dst-port=3128 action=mark-connection new-connection-mark=proxy passthrough=no
add chain=tcp-services protocol=tcp src-port=1024-65535 dst-port=3389 action=mark-connection new-connection-mark=win-ts passthrough=no
add chain=tcp-services protocol=tcp src-port=1024-65535 dst-port=4242-4243 action=mark-connection new-connection-mark=emule passthrough=no
add chain=tcp-services protocol=tcp src-port=4661-4662 dst-port=1024-65535 action=mark-connection new-connection-mark=overnet passthrough=no
add chain=tcp-services protocol=tcp src-port=4711 dst-port=1024-65535 action=mark-connection new-connection-mark=emule passthrough=no
add chain=tcp-services protocol=tcp src-port=1024-65535 dst-port=5900-5901 action=mark-connection new-connection-mark=vnc passthrough=no
add chain=tcp-services protocol=tcp src-port=1024-65535 dst-port=6667-6669 action=mark-connection new-connection-mark=irc passthrough=no
add chain=tcp-services protocol=tcp src-port=1024-65535 dst-port=6881-6889 action=mark-connection new-connection-mark=bittorrent passthrough=no
add chain=tcp-services protocol=tcp src-port=1024-65535 dst-port=8080 action=mark-connection new-connection-mark=http passthrough=no
add chain=tcp-services protocol=tcp src-port=1024-65535 dst-port=8291 action=mark-connection new-connection-mark=winbox passthrough=no
add chain=tcp-services protocol=tcp action=mark-connection new-connection-mark=other-tcp passthrough=no
Untuk bagian UDP juga ga kalah banyaknya loh ^^. :
Code:
add chain=udp-services protocol=udp src-port=1024-65535 dst-port=53 action=mark-connection new-connection-mark=dns passthrough=no
add chain=udp-services protocol=udp src-port=1024-65535 dst-port=123 action=mark-connection new-connection-mark=ntp passthrough=no
add chain=udp-services protocol=udp src-port=1024-65535 dst-port=1701 action=mark-connection new-connection-mark=l2tp passthrough=no
add chain=udp-services protocol=udp src-port=1024-65535 dst-port=4665 action=mark-connection new-connection-mark=emule passthrough=no
add chain=udp-services protocol=udp src-port=1024-65535 dst-port=4672 action=mark-connection new-connection-mark=emule passthrough=no
add chain=udp-services protocol=udp src-port=4672 dst-port=1024-65535 action=mark-connection new-connection-mark=emule passthrough=no
add chain=udp-services protocol=udp src-port=1024-65535 dst-port=12053 action=mark-connection new-connection-mark=overnet passthrough=no
add chain=udp-services protocol=udp src-port=12053 dst-port=1024-65535 action=mark-connection new-connection-mark=overnet passthrough=no
add chain=udp-services protocol=udp src-port=36725 dst-port=1024-65535 action=mark-connection new-connection-mark=skype passthrough=no
add chain=udp-services protocol=udp connection-state=new action=mark-connection new-connection-mark=other-udp passthrough=no
Nah yang ga di masukkan di tipe TCP dan UDP juga dimasukkin juga di mangle:
Code:
add chain=other-services protocol=icmp icmp-options=8:0-255 action=mark-connection new-connection-mark=ping passthrough=no
add chain=other-services protocol=gre action=mark-connection new-connection-mark=gre passthrough=no
add chain=other-services action=mark-connection new-connection-mark=other passthrough=no
Nah ini ada tips trick nya Dmitry:
Code:
Note that for TCP and UDP, we check both, source port (usually, 1024-65535) and destination port. Everything else is not a valid protocol.
so biasanya yang port aman diantara port 1024 sampai 65535 asal port yang dipake oleh client.

Invalid packet filter
Untuk memudahkan packet filter, maka dibuat dulu mangle sebagai berikut:
Code:
/ip firewall mangle
add chain=prerouting in-interface=Public dst-address-list=nat-addr action=mark-packet new-packet-mark=nat-traversal passthrough=no
Kita masukkan ip local, ip yang direstricted dan ip ISP kita biar bisa masuk ke mikrotiknya (mohon disesuaikan dengan kebutuhan yahhhhh):
Code:
/ ip firewall address-list
add list=illegal-addr address=0.0.0.0/8 comment="illegal addresses"
add list=illegal-addr address=127.0.0.0/8
add list=illegal-addr address=224.0.0.0/3
add list=illegal-addr address=10.0.0.0/8
add list=illegal-addr address=172.16.0.0/12
add list=illegal-addr address=192.168.0.0/16
add list=local-addr address=192.168.1.0/24 comment="my local network"
add list=local-addr address=10.1.0.0/16 comment="my Local ISP network"
add list=local-addr address=172.31.255.0/21 comment="my Public IP network"
add list=nat-addr address=192.168.1.0/24 comment="my local network"
Di atas terlihat 3 bagian daftar ip
illegal ----> daftar ip yang aneh-aneh dan yang di restricted
local-add ---> daftar ip jaringan kita, dan ip lokal ISP, dan juga IP Public kita
nat-addr ----> daftar block ip yang di masquerade (src-nat)

Port Scan Detector dan TCP-specific filters
Di bagian Filter Firewall Rule:
Kita bypass traffic untuk jaringan internal kita:
Code:
/ ip firewall filter
add chain=forward in-interface=Local out-interface=Local action=accept comment="Allow traffic between wired and wireless networks"
Nah disini mulai kita blok port Scanner dan intrusi dari luar ke mikrotik kita:
Code:
/ ip firewall filter
add chain=forward action=jump jump-target=sanity-check comment="Sanity Check"
add chain=sanity-check packet-mark=nat-traversal action=jump jump-target=drop comment="Deny illegal NAT traversal"
add chain=sanity-check protocol=tcp psd=20,3s,3,1 action=add-src-to-address-list address-list=blocked-addr address-list-timeout=1d comment="Block port scans"
add chain=sanity-check protocol=tcp tcp-flags=fin,psh,urg,!syn,!rst,!ack action=add-src-to-address-list address-list=blocked-addr address-list-timeout=1d comment="Block TCP Null scan"
add chain=sanity-check protocol=tcp tcp-flags=!fin,!syn,!rst,!psh,!ack,!urg action=add-src-to-address-list address-list=blocked-addr address-list-timeout=1d comment="Block TCP Xmas scan"
add chain=sanity-check protocol=tcp src-address-list=blocked-addr action=jump jump-target=drop
add chain=sanity-check protocol=tcp tcp-flags=rst action=jump jump-target=drop comment="Drop TCP RST"
add chain=sanity-check protocol=tcp tcp-flags=fin,syn action=jump jump-target=drop comment="Drop TCP SYN+FIN"
add chain=sanity-check connection-state=invalid action=jump jump-target=drop comment="Dropping invalid connections at once"
add chain=sanity-check connection-state=established action=accept comment="Accepting already established connections"
add chain=sanity-check connection-state=related action=accept comment="Also accepting related connections"
add chain=sanity-check dst-address-type=broadcast,multicast action=jump jump-target=drop comment="Drop all traffic that goes to multicast or broadcast addresses"
add chain=sanity-check in-interface=Local dst-address-list=illegal-addr dst-address-type=!local action=jump jump-target=drop comment="Drop illegal destination addresses"
add chain=sanity-check in-interface=Local src-address-list=!local-addr action=jump jump-target=drop comment="Drop everything that goes from local interface but not from local address"
add chain=sanity-check in-interface=Public src-address-list=illegal-addr action=jump jump-target=drop comment="Drop illegal source addresses"
add chain=sanity-check in-interface=Public dst-address-list=!local-addr action=jump jump-target=drop comment="Drop everything that goes from public interface but not to local address"
add chain=sanity-check src-address-type=broadcast,multicast action=jump jump-target=drop comment="Drop all traffic that goes from multicast or broadcast addresses"
Application protocol specific filters
Aplikasi spesifik yang membutuhkan rule tertentu:
Code:
/ ip firewall filter
add chain=forward protocol=tcp action=jump jump-target=restrict-tcp
add chain=forward protocol=udp action=jump jump-target=restrict-udp
add chain=forward action=jump jump-target=restrict-ip
add chain=restrict-tcp connection-mark=auth action=reject
add chain=restrict-tcp connection-mark=smtp action=jump jump-target=smtp-first-drop comment="anti-spam policy"
add chain=smtp-first-drop src-address-list=first-smtp action=add-src-to-address-list address-list=approved-smtp
add chain=smtp-first-drop src-address-list=approved-smtp action=return
add chain=smtp-first-drop action=add-src-to-address-list address-list=first-smtp
add chain=smtp-first-drop action=reject reject-with=icmp-network-unreachable
Nah karena koneksi port / protocol yang tidak bisa diklafikasikan di atas, maka kita drop saja ^^
Code:
/ ip firewall filter
add chain=restrict-tcp connection-mark=other-tcp action=jump jump-target=drop
add chain=restrict-udp connection-mark=other-udp action=jump jump-target=drop
add chain=restrict-ip connection-mark=other action=jump jump-target=drop
Nah kan jaringan kita sudah terprotek dari luar, tapi.... mikrotik kita juga butuh security nih..........., maka liat aja nih firewall dibawah:
Code:
/ ip firewall filter
add chain=input src-address-type=local dst-address-type=local action=accept comment="Allow local traffic \(between router applications\)"
add chain=input in-interface=Local protocol=udp src-port=68 dst-port=67 action=jump jump-target=dhcp comment="DHCP protocol would not pass sanity checking, so enabling it explicitly before other checks"
add chain=input action=jump jump-target=sanity-check comment="Sanity Check"
add chain=input dst-address-type=!local action=jump jump-target=drop comment="Dropping packets not destined to the router itself, including all broadcast traffic"
add chain=input connection-mark=ping limit=5,5 action=accept comment="Allow pings, but at a very limited rate \(5 per sec\)"
add chain=input in-interface=Local action=jump jump-target=local-services comment="Allowing some services to be accessible from the local network"
add chain=input in-interface=Public action=jump jump-target=public-services comment="Allowing some services to be accessible from the Internet"
add chain=input action=jump jump-target=drop
add chain=dhcp src-address=0.0.0.0 dst-address=255.255.255.255 action=accept
add chain=dhcp src-address=0.0.0.0 dst-address-type=local action=accept
add chain=dhcp src-address-list=local-addr dst-address-type=local action=accept
add chain=local-services connection-mark=ssh action=accept comment="SSH \(22/TCP\)"
add chain=local-services connection-mark=dns action=accept comment="DNS"
add chain=local-services connection-mark=proxy action=accept comment="HTTP Proxy \(3128/TCP\)"
add chain=local-services connection-mark=winbox comment="Winbox \(8291/TCP\)" disabled=no
add chain=local-services action=drop comment="Drop Other Local Services"
add chain=public-services connection-mark=ssh action=accept comment="SSH \(22/TCP\)"
add chain=public-services connection-mark=pptp action=accept comment="PPTP \(1723/TCP\)"
add chain=public-services connection-mark=gre action=accept comment="GRE for PPTP"
add chain=public-services action=drop comment="Drop Other Public Services"


to be continued....... (too long bos)
Sebagai catatan rule ICMP harus di letakkan di atas rule drop untuk TCP dan UDP kalo engga nanti kita g bisa ping ke mikrotik kita,lebih baik rule diatas jangan dibalik2 deh biar ga bingung ^^

Kalo kita ingin membangun NTP Server, Web Proxy, dan DNS Cache(Server???) di mikrotik kita, maka harus dibelokkan lewat NAT dibawah ini:
Code:
/ ip firewall nat
add chain=dstnat in-interface=Local connection-mark=dns action=redirect comment="proxy for DNS requests"
add chain=dstnat in-interface=Local connection-mark=http protocol=tcp action=redirect to-ports=3128 comment="proxy for HTTP requests"
add chain=dstnat in-interface=Local connection-mark=ntp action=redirect comment="proxy for NTP requests"

settingan untuk server yg di maksud diatas:
Code:
/ system ntp server
set enabled=yes broadcast=no multicast=no manycast=no
/ system ntp client
set enabled=yes mode=unicast primary-ntp=xxx.xxx.xxx.xxx secondary-ntp=0.0.0.0
/ ip proxy
set enabled=yes port=3128 parent-proxy=0.0.0.0:1 maximal-client-connections=1000 maximal-server-connections=1000
/ ip dns
set primary-dns=yyy.yyy.yyy.yyy secondary-dns=0.0.0.0 allow-remote-requests=yes cache-size=2048KiB cache-max-ttl=1w
Untuk ip dns di setting sesuai ip yang diberikan oleh ISP masing2.

Untuk ip NTP Server gue pake ip nya NTP Ubuntu: 91.189.94.4
tapi tereserah kalian deh kalo ga mau ip nya ubuntu pake ip yang laen boleh2 aja.

------------SSEELLEESSAAII----------------------

Mikrotik: case hotspot stiki.ac.id

Mikrotik: case hotspot stiki.ac.id
By admin

Kasus ini ditanyakan ke saya oleh mas Ronny Susetyo aka ballacksave, admin (ngaku-nya newbie) stiki.ac.id via YM

topologi-stiki.gif

Nah pertanyaan saya pada dasarx sama seperti dasep yaitu bgm client yg di bawah mikrotik
(dosen, sabarnet,hotspot) klo buka jaringan yg diatas mikrotik seperti webserver, mail dan webhosting (203.134.237.0/29) bisa nggak ke limit, tapi klo browsing ke internet tetep ke limit.
nb:
di mikrotikx saya pake /ip hotspot, untuk bagi2 bandwidthx……
mohon pencerahan…


Tambahan data-data:

  • Selama ini traffic sudah di limit mempergunakan fasilitas dari ip hotspot.
  • Memakai versi 2.9.6

Solusi nya :

  1. Buat queue simple baru dengan prioritas berbeda dari queue simple yang lain, misal 1,
    isikan dst address nya dengan tujuan server yang akan di unlimit
    0    name="UNLIMIT_INTRANET" target-addresses=0.0.0.0/0
    dst-address=203.134.237.245/32 interface=all parent=none priority=1
    queue=default/default limit-at=0/0 max-limit=0/0 total-queue=default
  2. profile.PNG Cara kerja queue simple sama seperti cara kerja firewall, dia akan meng-eksekusi rule pertama macth, dan mengabaikan rule berikutnya.
    Karena itu rule queue yang barusan di buat harus berada di atas rule queue buatan ip hotspot.
    Kendala yang terjadi, queue simpe dari ip hotspot akan mengubah urutan dan memposisikan queue yang telah dibuat secara manual di baris bawah.
    Maka dibutuhkan script agar posisi queue tadi tetap pada posisi diatas.
    Script tersebut diambil dari forum.mikrotik.com.
    Tuliskan script ini profile user hotpot, tepatnya di bagian on login
  3. Silakan logout (bila perlu) dan login kembali ke hotspot, dan coba untuk download dari
  4. Hasilnya
    stiki.PNG

Kendala :

Setelah selesai di konfigure dan dicoba, pada awalnya bw ke server intranet masih ter-limit.
Dugaan sementara kondisi ini terjadi karena ada aktifitas pembelokkan paket http ke internal proxy hotspot.

Untuk mematikan transparant proxy ini, bisa dilakukan dari menu hotspot profile, seperti pada saat penambahan script onlogin.

Setelah dimatikan/unchecked, logout-login, dan di tes ulang, hasilnya didapat server intranet sudah tidak dilimit.

Bila ingin tetap memakai proxy disarankan untuk membuat external proxy, lalu dibagian firewall-nat-nya bisa dibatasi agar pada saat menuju intranet tidak perlu dibelokkan ke external proxy.

14 Comments

  • At 2008.02.06 12:43, masterpop3 said:

    kerenn oom, tapi mikrotik saya koq ga bisa ngelimit BW ping ya , padahal udah di mark di mangle (keliatan ada counting) trus di queue simplenya aku naikin paling atas (number 0) ..tapi koq ga ngaruh yaaa…
    apa karena masih versi abal-abal..hehehe

  • At 2008.02.17 00:11, 3wyn said:

    Gue rasa ada trik lain untuk masalah yang sama seperti ini Om…
    Qta dapat menggunakan /ip firewall address list untuk mendefinisikan IP-IP address yang akan di EXCLUDE… trus selanjutnya di /ip queue tree itu bisa menentukan bahwa bandwidth limiter hanya akan bekerja jika client menuju jaringan selain jaringan yang IP nya telah diexclude diatas… Kira-kira begitu deh… Ini pernah saya lakukan agar komunikasi VOIP di LAN tetap lancar tanpa terkena aturan bandwidth… Thanx

  • At 2008.02.18 08:02, admin said:

    [Comment ID #37 Will Be Quoted Here]

    Terimakasih informasinya mas Ewyn
    Apakah di tempat mas Ewyn juga dibuat model hotspot ?
    Di hotspot ada mekanisme dinamik yang membuat aturan queue berpindah posisi.

    Solusi dipasang di queue tree saya rasa benar juga.
    Membuat saya ingat pernah membaca bahwa aturan di queue tree akan diprioritaskan terlebih dahulu daripada queue simple.

  • At 2008.02.23 12:04, hendrik said:

    mas saya masih baru menggunakan mikrotik. saya mau menanyakan, saya sudah mencoba untuk authenticati buat user yang mau menggunakan hotspot tetapi kendala saya jika sesudah logoff langsung log in lagi dengan user yang sama. saya ingin tampilan untuk log in keluar lagi agar user lain dpt menggunakan komputer yang sama dengan user yang berbeda tetapi kenyataannya mikrotik yang saya setting langsung login lagi dengan user sebelumnya. jadi bagaimana caranya jika sudah log off, tampilan log in dapat keluar lagi untuk user yang lain? terimakasih

  • At 2008.02.25 07:59, admin said:

    [Comment ID #40 Will Be Quoted Here]
    Mas Hendrik,

    Pastikan mikrotik yang anda pakai adalah lisensi Smile.

    Agar setiap kali user logoff langsung memasukkan menu login lagi.
    Anda dapat menghilangkan opsi cookie di profile user hotspot mikrotik.

  • At 2008.07.10 13:01, imam said:

    Yupp. Pada mikrotik yg lama (bajaka) kyknya user hotspot gak bisa automatis di Queue.. Asli donk..
    Baru tau ternyata da script yg gituan..

  • At 2008.07.15 21:18, andy said:

    om 3wyn dan om admin, trik yang meng-EXCLUDE menggunakan /ip firewall address list itu mohon untuk bisa dijelaskan. Mohon pencerahannya seperti apa cara ngesetnya termasuk ngeset di queue treenya, karena sy bener2 masih nubie. (Sekalian script yg dimasukkan di user profile hotspotnya).

    Sangat ditunggu jawabannya, dan mendesak.
    Sebelum dan sesudahnya saya ucapkan banyak terima kasih.

  • At 2008.07.16 19:22, human said:

    untuk script user hotspot dapat dilihat di gambar yang sudah saya buat.

    http://network.web.id/wp-content/uploads/2008/02/profile.PNG

  • At 2008.07.19 04:47, andy said:

    maksud saya, yg diexclude nanti adalah koneksi ke JIX dan IIX, sementara koneksi ke Internasional tetap terkena limit.
    Untuk model spt yang disampaikan om 3wyn diatas gimana caranya, termsuk setingan di mangle (marking connection & marking packet), karena menurut pemahaman saya pasti melakukan marking packet untuk trafik2 yg exclude tsb.
    Sbg permisalan, saya ingin koneksi ke IX (international) di limit 96kbps dan koneksi ke JIX (jogja internet exchange) dan IIX tidak terkena aturan limit yang dibuat otomatis oleh user manager.

    Mohon pencerahannya, sampai saat ini permasalahan saya belum terselesaikan.

    Terima kasih sebelum dan sesudahnya.

  • At 2008.07.21 15:57, human said:

    @andy

    Untuk membuat agar yang dilimit hanya internasional.
    mas Andy buat dulu mangle seperti yang di tutorial mikrotik.co.id.

    Lalu set di scriptnya agar dynamix simple queue mengambil parent dari queue internasional.

    Saya sudah mengaplikasikan hal ini di hotspot saya dan berfungsi dengan normal.

  • At 2008.07.24 11:38, andy said:

    terima kasih om,

    untuk seting mangle udah clear, yg masih belom saya paham adalah masalah membuat script -> agar dynamix simple queue mengambil parent dari queue internasional.
    Itu seperti apa dan bagaimana ya om, bisa minta tolong dijeskan sekalian gak om?
    Terima kasih dan mohon maaf sebelumnya, karena saya masih nubie Grin

    Kenal mikrotik juga masih baru sekali, belom ada 2 bulan, jadi saya mohon penjelasan yg lebih detail.

    Sekali lagi saya sampaikan terima kasih atas bantuannya.

  • At 2008.07.24 11:42, andy said:

    tambahan, apabila diperlukan, bisa saya sampaikan info network di tempat saya. Di sini atau lewat e-mail saya manut saja.
    Terima kasih.

MS SQL Server - Menyimpan multi tipe data

MS SQL Server - Menyimpan multi tipe data


Tingkatan Pemula


Kategori Database


Sub Kategori MS SQL Server


Judul Menyimpan data kedalam database dengan berbagai macam tipe data


Oleh
eko-indriyawan-png.png
Nama Eko Indriyawan
Domisili Surabaya - Darmo Satelit
Delphi Delphi 2007 for Win32
YM eko_elits
Email eko_elits@yahoo.com
Telp 031 - 605 384 36


Referensi by Eko Indriyawan


Tujuan
Mengajarkan kepada Delphier pemula untuk memasukkan data kedalam database MS SQL Server dengan berbagai macam tipe data.


Overview
Pada pembahasan materi kali ini akan diberikan tutorial mengenai cara pemasukan data kedalam database MS SQL Server dengan menggunakan berbagai macam tipe data yang diantaranya adalah string, integer, money, dan gambar.
Tentu saja proses pemasukan data ini harus menggunakan beberapa fitur tambahan agar mudah untuk dijelaskan. Pembahasan materi kali ini terintegrasi dengan tutorial lain seperti pembuatan tabel, stored procedure, membangun koneksi database dan lain-lain. Diharapkan dengan demikian ini bisa membuat logika anda makin terasah untuk bisa saling menghubungkan antara bagian yang satu dengan bagian yang lain.
Untuk keperluan tutorial, didalam file download-an sudah disertakan dengan 2 gambar contoh.
Selamat mencoba artikel ini dan semoga berhasil. Amin…


Petunjuk :
Silahkan anda ikuti langkah - langkah berikut ini dengan pelan - pelan agar bisa berjalan dengan lancar sesuai dengan petunjuk yang sudah diberikan.


Langkah 1
Sebagai tahap awal, silahkan anda buat program aplikasi baru.


Langkah 2
Tambahkan beberapa object kedalam form Form1.


Button5: TButton;
DataSource1: TDataSource;
ADOConnection1: TADOConnection;
ADOStoredProc1: TADOStoredProc;
ADOStoredProc2: TADOStoredProc;
OpenPictureDialog1: TOpenPictureDialog;
PageControl1: TPageControl;
TabSheet1: TTabSheet;
TabSheet2: TTabSheet;
Panel1: TPanel;
Label11: TLabel;
Label12: TLabel;
Label13: TLabel;
Edit7: TEdit;
Edit8: TEdit;
Edit9: TEdit;
Button6: TButton;
ComboBox1: TComboBox;
Label5: TLabel;
Label4: TLabel;
Edit4: TEdit;
Label3: TLabel;
Edit3: TEdit;
Label2: TLabel;
Edit2: TEdit;
Label1: TLabel;
Edit1: TEdit;
Button1: TButton;
DateTimePicker1: TDateTimePicker;
Label9: TLabel;
Label8: TLabel;
Label7: TLabel;
Label6: TLabel;
Edit6: TEdit;
Edit5: TEdit;
Panel2: TPanel;
Image1: TImage;
Button3: TButton;
Button2: TButton;
Bevel1: TBevel;
TabSheet3: TTabSheet;
Label10: TLabel;
Button4: TButton;
Panel3: TPanel;
Image2: TImage;
DBGrid1: TDBGrid;


Langkah 3
Kemudian anda atur tampilan object-object menjadi menjadi seperti terlihat pada gambar-gambar berikut ini.


pemulasqlserver000009.png


pemulasqlserver000010.png


pemulasqlserver000011.png


Langkah 4
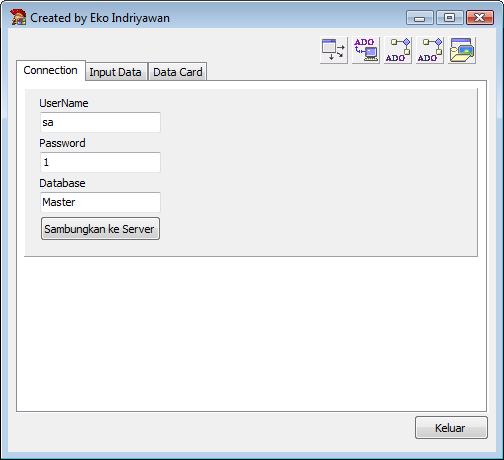
Langkah selanjutnya adalah kita akan membangun koneksi database MS SQL Server. Untuk itu, silahkan anda klik 2x tombol Sambungkan ke Server dan isikan kode program didalam event OnClick seperti terlihat pada potongan kode program dibawah ini.


procedure TForm1.Button6Click(Sender: TObject);
begin
with ADOConnection1 do
begin
ConnectionString := ‘Provider=SQLOLEDB.1;‘+
Password=‘+Edit8.Text+’;‘+
Persist Security Info=True;‘+
User ID=‘+Edit7.Text+’;‘+
Initial Catalog=‘+Edit9.Text;
Connected := True;
end;
end;


Langkah 5
Setelah itu, silahkan anda tambahkan library jpeg kedalam bagian uses. Untuk lebih detailnya, silahkan anda lihat potongan kode program dibawah ini.


uses
Windows, Messages, SysUtils, Variants, Classes, Graphics, Controls, Forms,
Dialogs, StdCtrls, ComCtrls, ExtCtrls, Grids, DBGrids, DB, ADODB, jpeg,
DBCtrls, ExtDlgs;


Sekarang silahkan anda lanjutkan dengan membuat tabel Card seperti ditunjukkan pada tutorial membuat tabel sederhana.


Langkah 7
Kemudian anda lanjutkan dengan membuat stored procedure simpan seperti ditunjukkan pada tutorial membuat stored procedure simpan.


Langkah 8
Selanjutnya anda buat stored procedure untuk menampilkan semua data seperti ditunjukkan pada tutorial membuat stored procedure sederhana.


Langkah 9
Setelah selesai membuat stored procedure, maka saatnya untuk mengakses stored procedure tersebut.


Langkah 10
Sebagai tahap awal, silahkan anda aktifkan ADOConnection1 agar stored procedurenya bisa diakses saat design time. Tentu saja silahkan anda isikan data connectionstring-nya dengan data yang benar.


Langkah 11

Fokuskan perhatian anda pada object ADOStoredProc1.


Langkah 12

Tentukan data property Connection-nya dengan ADOConnection1.


Langkah 13

Setelah itu, silahkan anda tentukan ProcedureName-nya dengan data Simpan Data;1.


Langkah 14

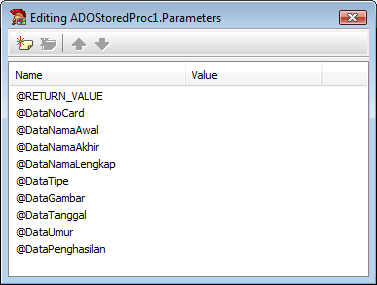
Kemudian pada bagian tombol property Parametersanda klik sekali hingga didapatkan tampilan data parameter seperti gambar berikut ini.


pemulasqlserver000012.png


Langkah 15

Sekarang anda fokuskan perhatian anda kepada object ADOStoredProc2.


Langkah 16

Tentukan data property Connection-nya dengan ADOConnection1.


Langkah 17

Setelah itu anda tentukan ProcedureName-nya dengan data Menampilkan semua data;1


Langkah 18

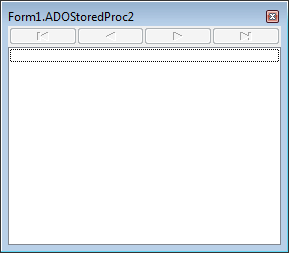
Selanjutnya silahkan anda klik 2x object ADOStoredProc2hingga didapatkan tampilan seperti berikut ini.


pemulasqlserver000013.png


Langkah 19

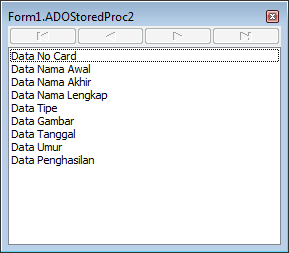
Kemudian anda tekan tombol Ctrl + Fhingga didapatkan tampilan seperti berikut dibawah ini.


pemulasqlserver000014.png


Langkah 20

Sekarang anda fokuskan perhatian anda ke object DataSource1


Langkah 21

Tentukan property dataset-nya dengan data ADOStoredProc2.


Langkah 22

Selanjutnya anda fokuskan perhatian anda kepada object DBGrid1.


Langkah 23

Pada bagian property DataSource, silahkan anda tentukan dengan data DataSource1.


Langkah 24

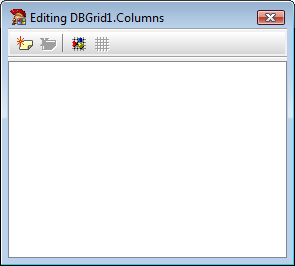
Lanjutkan dengan mengklik 2x object DBGrid1hingga didapatkan tampilan seperti berikut dibawah ini.


pemulasqlserver000015.png


Langkah 25

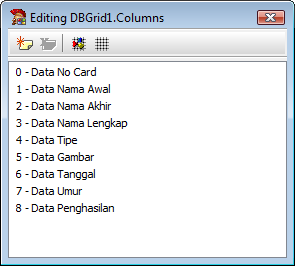
Silahkan anda tekan tombol Add All Fieldshingga didapatkan tampilan seperti berikut ini.


pemulasqlserver000017.png


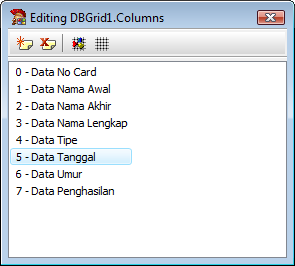
Langkah 26

Kemudian untuk field Data Gambar-nya anda hapus hingga didapatkan tampilan seperti berikut ini.


pemulasqlserver000018.png


Langkah 27

Selanjutnya anda tutup editor tersebut.


Langkah 28

Sekarang anda fokuskan perhatian anda ke object OpenPictureDialog1


Langkah 29

Pada bagian property filterisikan data seperti berikut ini. (Tuliskan secara berurutan)


All (*.jpg;*.jpeg;*.bmp;*.emf;*.wmf)|*.jpg;*.jpeg;*.bmp;*.emf;*.wmf|JPEG Image File (*.jpg)|*.jpg|JPEG Image File (*.jpeg)|*.jpeg|Bitmaps (*.bmp)|*.bmp|Enhanced Metafiles (*.emf)|*.emf|Metafiles (*.wmf)|*.wmf


Langkah 30

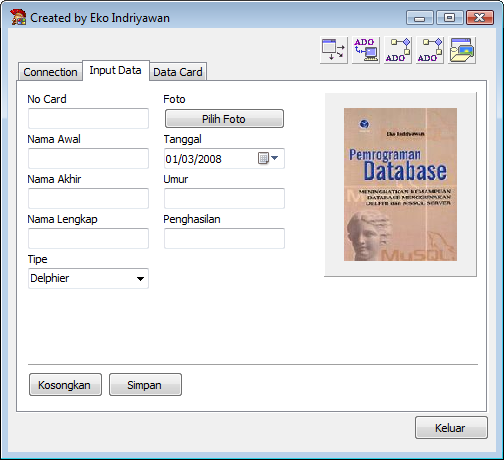
Langkah selanjutnya silahkan anda buka tab Input Data. Lanjutkan dengan memberikan nilai False pada bagian property Enabled dari object untuk kotak edit Nama Lengkap.


Langkah 31

Klik 2x tombol pilih fotoOnClickseperti terlihat pada potongan gambar dibawah ini.


procedure TForm1.Button1Click(Sender: TObject);
var
ListBitmap : array[0..2] of string;
temp : string;
indek : Integer;
begin
ListBitmap[0] := ‘.wmf’;
ListBitmap[1] := ‘.bmp’;
ListBitmap[2] := ‘.emf’;
if OpenPictureDialog1.Execute then
begin
temp := ExtractFileExt(OpenPictureDialog1.FileName);
for indek := 0 to 2 do
if ListBitmap[indek] = temp then
begin
Image1.Picture.Bitmap.LoadFromFile(OpenPictureDialog1.FileName);
exit;
end;
Image1.Picture.LoadFromFile(OpenPictureDialog1.FileName);
end;
end;


Langkah 32

Lanjutkan dengan mengklik 2x tombol Kosongkan dan isikan kode program didalam event OnClickseperti terlihat pada potongan kode program dibawah ini.


procedure TForm1.Button2Click(Sender: TObject);
begin
Edit1.Text := ”;
Edit2.Text := ”;
Edit3.Text := ”;
Edit4.Text := ”;
Edit5.Text := ”;
Edit6.Text := ”;
Image1.Picture := nil; // mengosongkan isi Image1 lebih lanjut disini
end;


Langkah 33

Kemudian anda klik 2x tombol Simpan dan isikan kode program didalam event OnClick dengan seperti terlihat pada potongan kode program dibawah ini.


procedure TForm1.Button3Click(Sender: TObject);
var
Foto : TMemorystream;
begin
Foto := TMemorystream.Create;
Image1.Picture.Graphic.SaveToStream(Foto);
with ADOStoredProc1 do
begin
Tag := 0;
Tag := Tag + 1; Parameters[tag].Value := Edit1.Text;
Tag := Tag + 1; Parameters[tag].Value := Edit2.Text;
Tag := Tag + 1; Parameters[tag].Value := Edit3.Text;
Tag := Tag + 1; Parameters[tag].Value := Edit4.Text;
Tag := Tag + 1; Parameters[tag].Value := ComboBox1.Text;
Tag := Tag + 1; Parameters[tag].LoadFromStream(Foto,ftBlob);
Tag := Tag + 1; Parameters[tag].Value := DateTimePicker1.Date;
Tag := Tag + 1; Parameters[tag].Value := StrToInt(Edit5.Text);
Tag := Tag + 1; Parameters[tag].Value := StrToInt(Edit6.Text);
Edit1.Text := ”;
Edit2.Text := ”;
Edit3.Text := ”;
Edit4.Text := ”;
Edit5.Text := ”;
Edit6.Text := ”;
Image1.Picture := nil;
ExecProc;
end;
end;


Langkah 34

Kemudian pada bagian property Items pada object Combobox1 anda isikan data berikut :


Delphier
Penyanyi
Penulis
Pengangguran
Pengkritik


Langkah 35

Setelah itu buka tab Data Card


Langkah 36

Lanjutkan dengan mengklik 2x tombol Refresh dan isikan kode program didalam event OnClick seperti terlihat pada potongan kode program dibawah ini.


procedure TForm1.Button4Click(Sender: TObject);
begin
with ADOStoredProc2 do
begin
Close;
Open;
end;
end;


Langkah 37

Selanjutnya anda fokuskan perhatian anda pada object DBGrid1


Langkah 38

Silahkan anda tuliskan kode program dibawah ini pada event OnDblClick.


procedure TForm1.DBGrid1DblClick(Sender: TObject);
var
// deklarasikan stream
Stream : TADOBlobStream;
// deklarasikan temporary gambar
GambarJpeg : TJpegImage;
GambarBmp : TBitmap;
// deklarasikan buffer
Buffer : Word;
begin
// buat object temporary gambar
GambarJpeg := TJpegImage.Create;
GambarBmp := TBitmap.Create;
// pemasukan data ke stream
Stream := TADOBlobStream.Create(ADOStoredProc2DataGambar,bmRead);
// identifikasi buffer yang merepresentasikan sebagai class gambar
Stream.Read(Buffer,SizeOf(Buffer));
Stream.Position := 0;
// jika gambar merupakan class JPEG
if Buffer = $D8FF then
begin
GambarJpeg.LoadFromStream(Stream);
Image2.Picture.Graphic := GambarJpeg;
end
// jika gambar merupakan class bmp
elseif Buffer = $4D42 then
begin
GambarBmp.LoadFromStream(Stream);
Image2.Picture.Bitmap := GambarBmp;
end;
end;


Langkah 39

Kemudian pada bagian property Connected dari object ADOConnection1 anda berikan nilai False.


Langkah 40

Sekarang silahkan anda compile program aplikasi anda dengan menekan tombol Ctrl + F9.


Langkah 41

Lanjutkan dengan menekan tombol F9 hingga program siap untuk dijalankan.


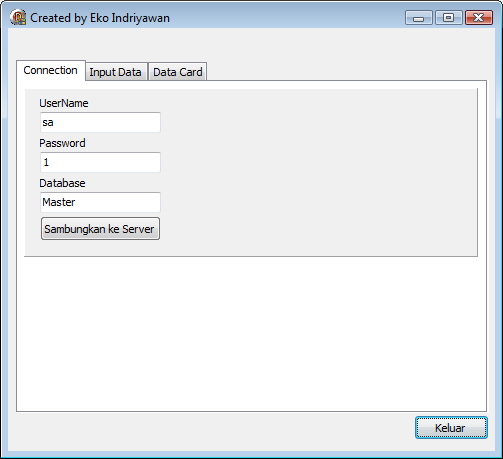
pemulasqlserver000019.png


Langkah 42

Kemudian anda lanjutkan dengan menekan tombol Sambungkan ke Server.


Langkah 43

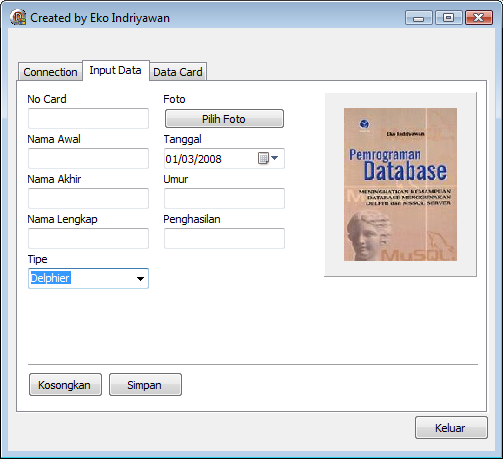
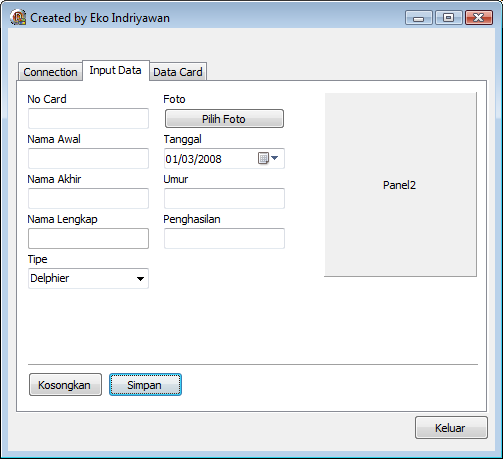
Lanjutkan dengan membuka tab Input Data


pemulasqlserver000020.png


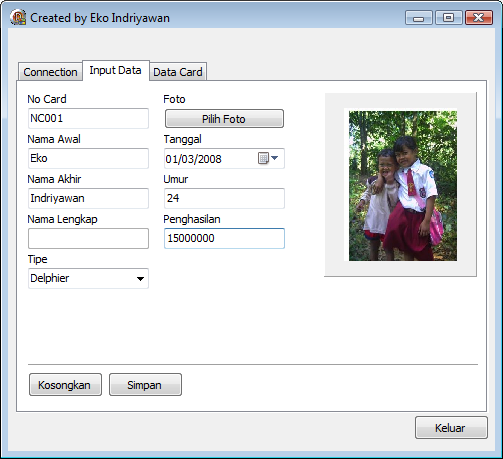
Langkah 44

Kemudian isikan data seperti berikut ini.


pemulasqlserver000021.png


Langkah 45

Lanjutkan dengan menekan tombol Simpan hingga didapatkan tampilan seperti berikut ini


pemulasqlserver000022.png


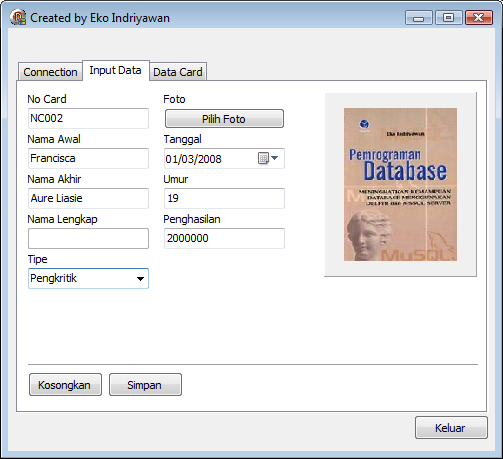
Langkah 46

Isikan data sekali lagi dengan data inputan seperti berikut


pemulasqlserver000023.png


Langkah 47

Tekan tombol Simpan hingga didapatkan tampilan seperti berikut.


pemulasqlserver000022.png


Langkah 48

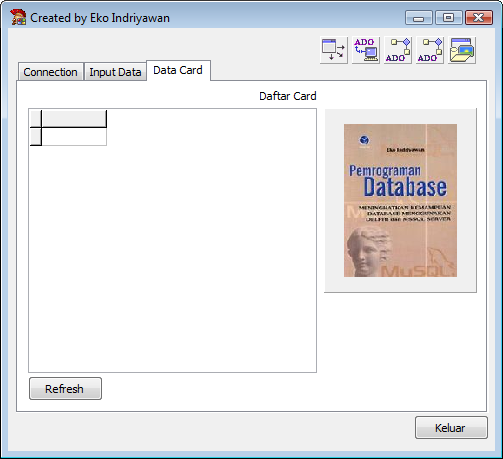
Setelah itu anda buka tab Data Card


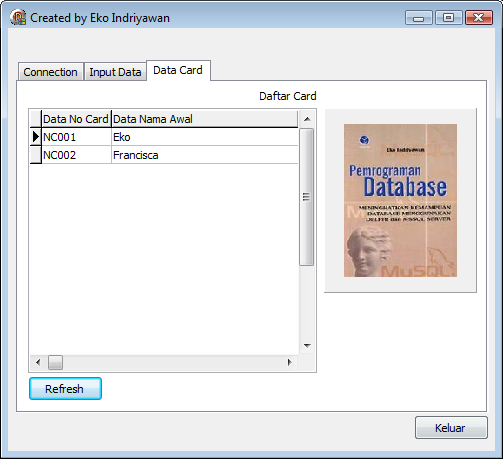
pemulasqlserver000024.png


Langkah 49

Lanjutkan dengan menekan tombol Refresh hingga didapatkan tampilan seperti berikut ini.


pemulasqlserver000025.png


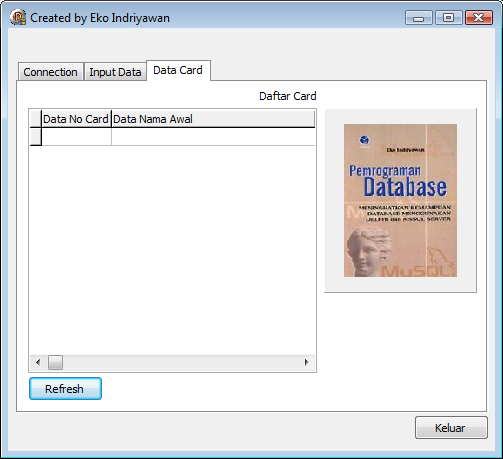
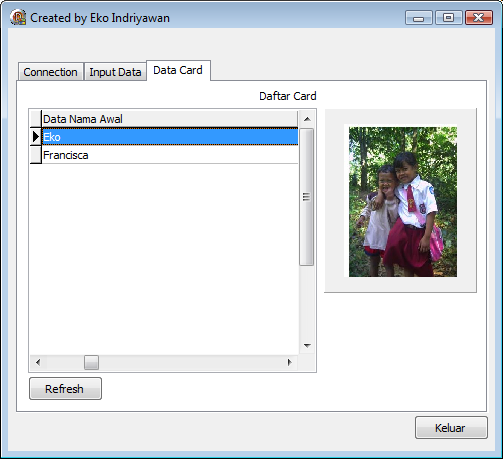
Langkah 50

Silahkan anda klik 2x pada data Eko, jika berhasil maka akan ditampilkan tampilan seperti berikut ini.


pemulasqlserver000026.png


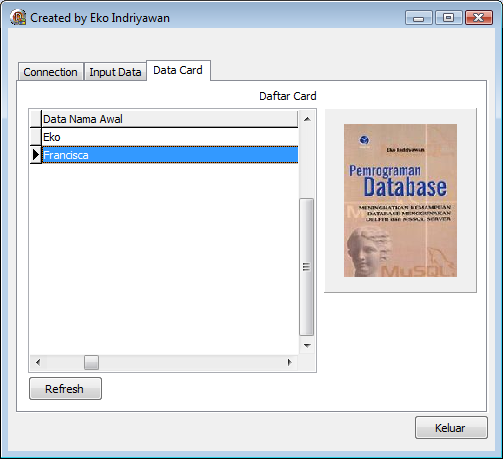
Langkah 51

Sekarang anda lanjutkan dengan mengklik 2x untuk data Francisca, dan apabila berhasil akan ditunjukkan tampilan seperti gambar dibawah ini.


pemulasqlserver000027.png


Langkah 52

Program selesai dibuat dan silahkan anda tutup program aplikasinya.


Download
Silahkan anda download link diatas untuk mendapatkan contoh program aplikasi secara lengkap.
Ada beberapa masukan dan keluhan dari teman - teman, bahwa ada beberapa program contoh tidak bisa dijalankan dari delphi 7. Hal ini dikarenakan program contoh dibuat dengan menggunakan Delphi 2007 for win32.
Apabila anda menggunakan D7, sebaiknya anda mengikuti pandauan dari langkah - langkah yang sudah diberikan.
Atas perhatiannya, saya mengucapkan banyak terimakasih.