You wanna submit responses to your Google Forms in a REST-ful API
call, or rather programmatically in code or easily from a Postman-like
tool? Then you’re welcome to stick around here… 
So you remember my last post on my journey of hacking around Google Forms, trying to be a smart-ass eh! Let’s auto fill Google Forms with URL parameters…
Oh yeah that one right there, well that was just the tip of the ice
berg of me playing around with Google Forms! Let me share the next set
of cool tricks I figured out here! 
This little trick of submitting data RESTfully to your Google form,
could become very handy if you wanted to build your own improved custom
UI for submitting data to your Google Form, along with your own
validations for the fields or even to quickly populate a bunch of sample
data from your Form for experimental reason. Them awesome possibilities
are endless!
Well.. Google Forms with RESTful ?!?
So during my adventures into messing around with Google Forms, I
figured out that we can submit data into our Google Forms using their
REST API endpoint! So how cool is that eh, we can directly post data
into our form RESTfully, from whatever the medium you prefer,
programmatically, or Postman like tool!
So in this post lemme share that cool trickery bits with you…
Let the hack begin…
Now keep in mind unlike the last post, this is a bit advanced trick which requires some experience on HTML and web development, well it could easily help at least.
We’re gonna get the REST endpoint source of our Google Form, package our question-field-answer data into a request object and submit it to the REST endpoint directly, using Postman or Programmatically in code.
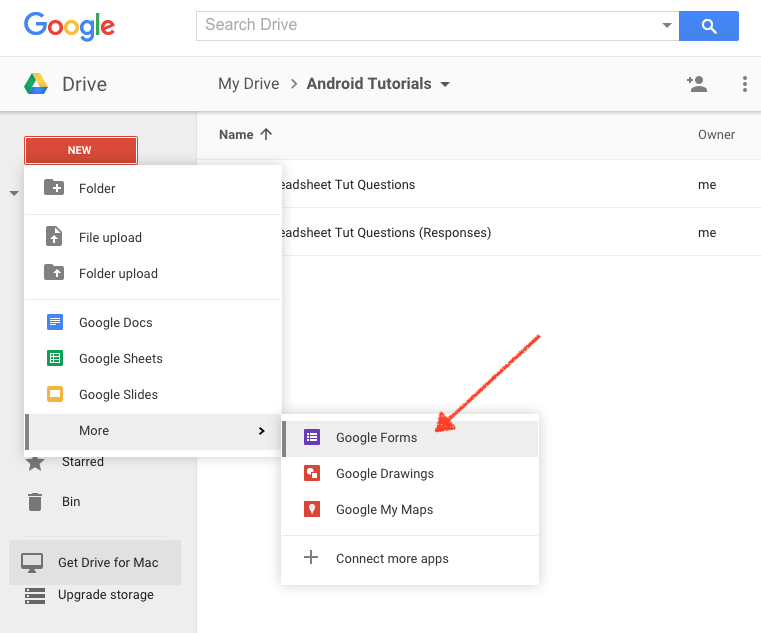
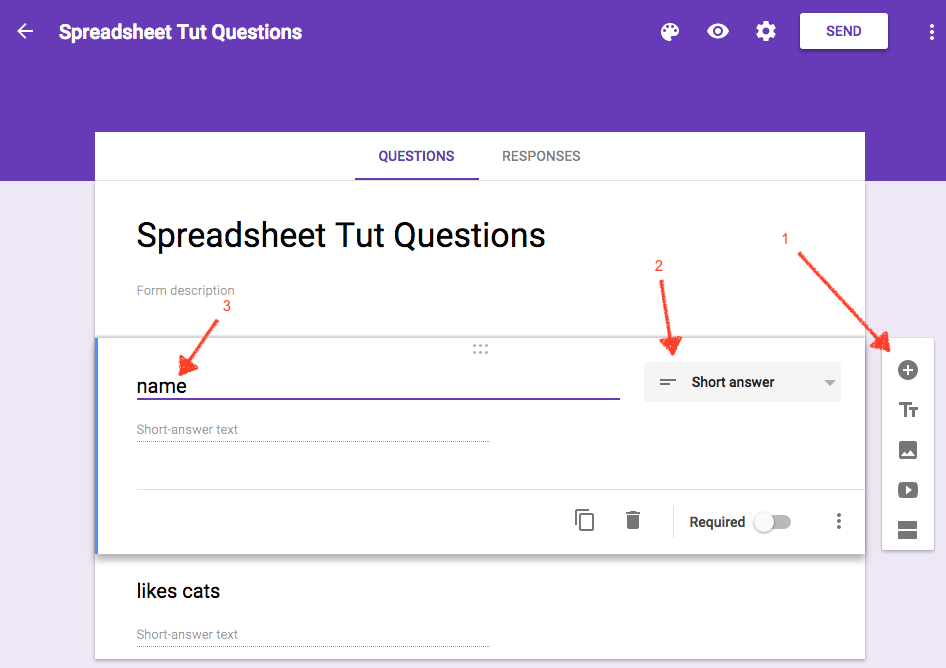
Now for this post also let’s use the same sample questionnaire Google Form that I created for last post’s demo.
https://docs.google.com/forms/d/e/1FAIpQLSeuZiyN-uQBbmmSLxT81xGUfgjMQpUFyJ4D7r-0zjegTy_0HA/viewform
Little sneak peak:

So now we got a Google Form, let’s start the little hack by finding the field IDs in the form…
Yes, you still gotta hook up the fields!
Remember in my last post I explained about the Fields in our Google
Form having unique identifiers (or IDs) that we can use to attach data
into for submission? well you still need em! 
Now for this you could still use the methods we discussed in the previous post to get the list of ID of the fields in your Google Form, but this time I’ll introduce some easier ways, since we’re moving to a bit advance trick…
Hooking up to the fields and Endpoint…
Keep in mind this requires a little bit experience in web dev!
Basically we’re going to get the list of Field IDs by tracing the
submission request call in our Google Form, which will also help us
figure out the REST endpoint link.
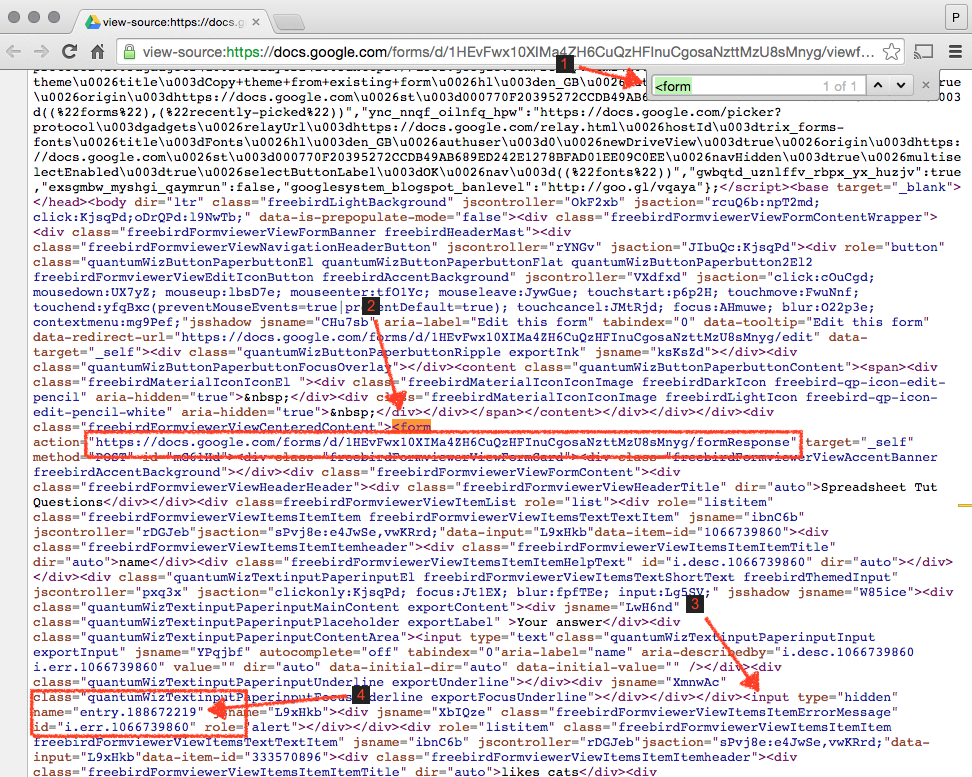
So open up your Google Form in Chrome browser and open up developer tools by using the browser menu or on Windows click “Ctrl+Shift+I keys” in the keyboard.

Now to make the magic work, go to “Network” tab in the menu list which will allow us monitor the network trace that’s going to be sent from browser to Google Form submission REST endpoint.

Next, you need to fill up all the question fields in your Google Form and hit submit button. Carefully watch what happens in the developer console!

Yep a whole bunch of logs pops up, which shows you the traces of all the network calls that occurred in the last “Submit” button click. And in there the most important request log is the “formResponse” log as you seen above.
Click on formResponse log which will bring up all the details on it.

Now this is quite awesome, it will show you in 4 separate sections all the details about the Google Form submission data endpoint that just occurred.
https://docs.google.com/forms/d/e/1FAIpQLSeuZiyN-uQBbmmSLxT81xGUfgjMQpUFyJ4D7r-0zjegTy_0HA/formResponse
The Request URL is the endpoint we’re going to be using to submit our form data and the Form Data section is where you’ll find the list of field identifiers of your Google Form.

Now that your holy grail of list of field identifiers in bulk. So go ahead, highlight that chunk of text and copy it up to some notepad to be used later.
Now if you noticed the ID with the “entry.1155533672_sentinel” is something that you can ignore, since its a repeated field coming from the Check box question field in your Google Form!
Just like that you can easily extract the list of IDs of the fields in your Google Form!
entry.1277095329: Bibimbap Turtles
entry.995005981: Banana Plums
entry.1155533672: Dogs with hats
entry.1579749043: Jumping Apples
entry.815399500_year: 2019
entry.815399500_month: 11
entry.815399500_day: 11
entry.940653577_hour: 00
entry.940653577_minute: 30
Now that’s the form data sample from my Google Form!
Shove it up into a Postman!
Or any of the web dev tools you prefer to make a simple REST api call. Up to you! lol. Let’s create a POST call with our Google Forms submission API endpoint which we retrieved in the above step.
Actually this URL you could easily make up using your Google Form publish url, just by replacing viewform with formResponse suffix.

So make sure to add the Body parameters of type x-www-form-urlencoded, and list out all the question field IDs and their values you’d like to inject in to the submission. Since then you need to apply header Content-Type as application/x-www-form-urlencoded which will enable our body parameters object.
Assuming you have set up all the body form fields properly, let’s fire it up!
Fire it up!
Let’s go ahead and execute the REST posting! Hit “Send“, and bam!

You should get a successful 200 Status Code response with the above success message “Your Response has been recorded.” inside a whole bunch of HTML content and if you move to the “Preview” tab, you can see how the rendered UI being returned as well.

Now let’s say if you missed adding any specific field in the request body, that was already marked as “Required” in your Google Forms template, and you had hit “Send”. In that case it would return a bad request 400 Status Code with the error in HTML content, “This is a required question”, or with whatever the custom error message you configured your Google Form with.

Yeah you can even view in the Preview tab with the rendered HTML content.

Pretty neat eh! the same way it would behave in a browser environment
you can duplicate in a RESTful environment such as Postman!
Now let’s see how easy it is to push that into some code and execute this programatically!
Shove it up into a Code snippet!
Alright let’s shove that into a simple C# snippet where we could POST
a simple HTTP request with the body parameters of our Google Form! Basically replicating the same execution as Postman you saw above!
| private static async Task ExecuteGoogleFormsSubmitAsync() |
| { |
| // Init HttpClient to send the request |
| HttpClient client = new HttpClient(); |
|
|
| // Build the Field Ids and Answers dictionary object |
| // (replace with your Google Form Ids and Answers) |
| var bodyValues = new Dictionary<string, string> |
| { |
| {"entry.1277095329","Orange Snails"}, |
| {"entry.995005981","Banana Plums"}, |
| {"entry.1155533672","Monkeys with hoodies"}, |
| {"entry.1579749043","Jumping Apples"}, |
| {"entry.815399500_year","2019"}, |
| {"entry.815399500_month","11"}, |
| {"entry.815399500_day","11"}, |
| {"entry.940653577_hour","04"}, |
| {"entry.940653577_minute","12"}, |
| }; |
|
|
| // Encode object to application/x-www-form-urlencoded MIME type |
| var content = new FormUrlEncodedContent(bodyValues); |
|
|
| // Post the request (replace with your Google Form Link) |
| var response = await client.PostAsync( |
| "https://docs.google.com/forms/d/e/" + |
| "1FAIpQLSeuZiyN-uQBbmmSLxT81xGUfgjMQpUFyJ4D7r-0zjegTy_0HA" + |
| "/formResponse", |
| content); |
|
|
| // Use the StatusCode and Response Content |
| Console.WriteLine($"Status : {(int)response.StatusCode} {response.StatusCode.ToString()}"); |
| Console.WriteLine($"Body : \n{await response.Content.ReadAsStringAsync()}"); |
| |
| // Imagination is the limit yo! |
| } |
 by
by Above we’re using a simple dotnet HttpClient to execute our Google Form submission REST post call, by adding the body values dictionary into the request.
And then we’re printing the Status Code and the HTTP content response we get.
Hit F5!
If you hit F5 on the above code in Visual Studio, you should get the following.

We are successfully submitting our Google Form data to the REST
endpoint and getting the success code, along with the usual HTML
content, same as how got in Postman.
Now let’s say if something went wrong, or you missed a required field in your request body,

It will show up the same error handling we got in Postman, as 400 Bad Request! And if you dive into the HTML content, you can see how the error message was also delivered back.
So now you know how to programmatically submit data to your Google Forms in code!
Imagination is the limit yol!
Well… That’s it!
It’s quite straightforward how Google has built these forms in such a simple manner for you to handle them easily as you wish. Kudos Google!
Now keep in mind all these are simple hacks and tricks derived by
careful observation of html code and network traffic, and we do not have
precise control whether Google will change these format and rendering
patterns in future, so you gotta keep an eye out if you’re planning to
use these hacks for a long term solid implementation.
My suggestion would be to write up a series of Test cases (TDD yo!)
which would test for the above process flows to make sure they’re
working as expected and notify you in case of any changes from Google.
You can do all kinds of cool stuff with it! So there you have it, how you may RESTfully submit to your Google Forms!
Share the love! Cheers!
https://theconfuzedsourcecode.wordpress.com/2019/11/11/you-may-restfully-submit-to-your-google-forms/
")